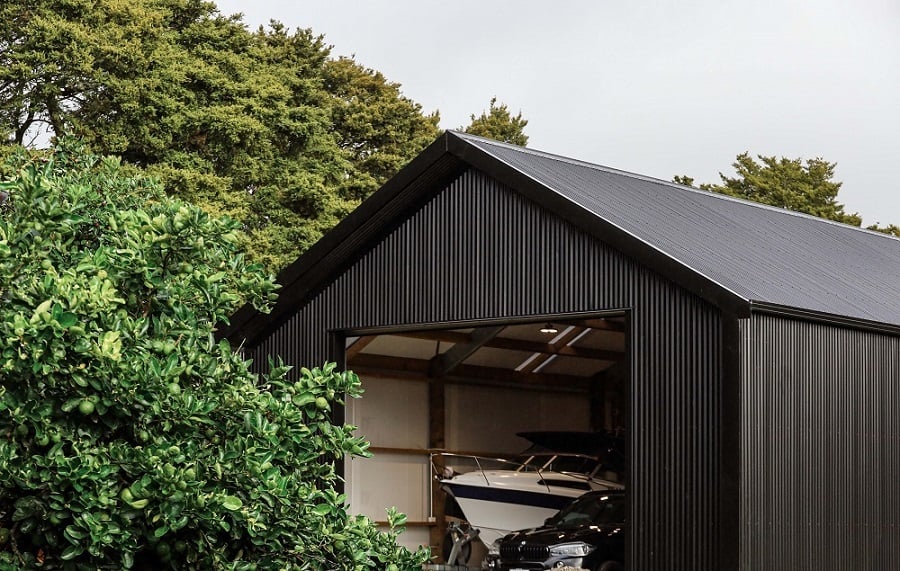
If you are planning a new shed project, you might have the following questions:
- How do I choose the right shed design for my needs?
- Will it meet my current and future needs?
- Is it going to be wide enough, long enough, and have enough clearance height?
- How much can I customise this shed, and how flexible is the design?
These are all valid questions, and ones we hear often. In this blog, we discuss what aspects of your shed can be customised to fit your own unique requirements, for both now and for the long term.
Shed size
When customising your shed, a good place to start is with its size.
Every shed has its own set of unique requirements, needs, and uses, so not everyone will need several hundred square meters of shed space. As a result, a one-size-fits-all approach is not an option. The Alpine design isn’t restricted to an “off the shelf” design that may be found at other suppliers.
Our structural steel rafter system is available in widths between 12 - 21 metres, with the most common widths being 12, 15, 18, 20, and 21 metres.
As for length, once again, the Alpine system can be tailored to fit your needs, starting at about 18 metres.
Working out the shed depth can be tricky, but knowing what you're storing and the approximate length is a good place to start. In the case of storing cars, how many would you like to store per bay? Cars are typically about 5-6m long, so if you store two deep, then a minimum span is 12 metres. When the implement is attached to the tractor, how long is it? What size caravan or truck do you need to accommodate? It is wise to take measurements of your equipment, since this is a critical component of the shed and cannot be changed down the road.
Find inspiration here in our extensive gallery.
Shed Height
Another critical factor that can’t be overlooked is the height of the building as this cannot be changed at a later date and has a serious impact on what your shed can be used for now and in the future. Getting enough height in your Alpine building in the design stage is reasonably easy to do and is more cost-effective than you may think. All that is required is longer poles, some more wall cladding, and potentially another row or two of girts. (Keep in mind that, in some cases, the diameter of the poles may need to be increased to meet engineering requirements which will result in additional cost).
It makes sense to invest a little more money and add a little more height, you may regret not doing so 10-15 years down the track when you cant fit your brand new implement inside. The height of your roller doors also determines the height of the building to some extent, if you are requiring a 4.0m high roller door on the front or backside, you will need to set the side of your building at a minimum of 4.6m, so there is enough room for the roller door drum to fit under the purlins.
Another point to note is that a standard four-post car hoist usually requires a minimum shed height of 4.0m.
Bay Configuration
Your bays may need to be set up differently. Is it possible to have an enclosed workshop and a few open bays in the same shed?
Certainly, this configuration is common. Come up with a bay configuration that works for you by considering how much workshop space you need, and how many open-fronted bays you need.
You may also wonder, what if I add on a few bays in the future? This is certainly an option and can be a good way to stagger the overall cost of the build however you may want to make provision for the extension now and have a clearspan steel rafter in the end wall so you can remove the entire wall so you can keep the shed fully clearspan rather than being stuck with poles in the way from the previous end wall.
Internal Walls
Is it possible to separate one area of the shed from another? Yes, the easiest way to do it is to remove the clearspan steel rafter and install center poles. This allows the walls to be built by attaching girts and cladding to them.
Note: You cannot remove the poles once the shed is built since they are structural. Make sure you carefully consider this before building the shed.
Alternatively, you can keep the clearspan steel rafter in the roof and frame out a partition wall with standard house framing at a later date. This way you can work out exactly where you want it positioned, and as it isn’t structural, it can be removed and put somewhere else if required.
Find out how Matt utilised an internal wall for his irrigation business here.
Overhangs
Adding overhangs to a shed can provide more rain protection and improve its appearance. They are an easy add-on to an Alpine shed. All that is required is a longer runs of roofing iron and cantilevering the steel rafters and the timber beams over the poles. Overhangs typically range in size from 900mm to 2.0m without brace backs, which we recommend avoiding. Brace backs are an area where birds can perch and they can be hit by tall vehicles which can cause costly damages to both the vehicle and the shed.
Roof pitch
The Alpine designs work off a standard pitch of 12-15 degrees for our clearspan range.
This works well with the engineering of the shed, however, if you want a steeper pitch to match your house or another existing structure, this can be achieved. Typically, the design can be changed to get a pitch as steep as 35 degrees.
Concrete floor
Concrete floors usually fall under the installation costs however this is easily customised to fit your requirements. As the concrete floor is not factored into the engineering of an Alpine shed, it is simply an accessory. The thickness of the floor will depend entirely on the weight of the vehicles driving on it.
For any man cave, car storage, or standard lifestyle shed, a 100mm concrete floor is typically fine (note If you intend to put in a car hoist you may need to increase the concrete thickness to ensure you meet the hoist specifications). If you are driving medium size tractors or trucks over it, a 125mm concrete floor would be better suited. For any heavier tractors, trucks, or machinery, a 150mm or thicker floor would be recommended.
Clearlight
Clearlight is a common addition to sheds as it provides natural light within the interior.
Clearlight panels can be installed anywhere you need them. We commonly see clients opt for one strip of clearlight per bay, on either side of the roof of the shed.
If you don’t want so much light/UV in your shed, you can put it in every second bay, or alternatively, you can put it in the walls of the shed.
Some people shy away from this option as it can be viewed as being less secure than iron and the shed can be easier to break into resulting in the theft of equipment etc.
Colour
There are typically two options for iron cladding, there is either Zincalume (standard silver iron) or coloursteel. Coloursteel is a more costly option than Zincalume however it comes in many different colours to choose from. Availability and lead times may vary depending on which colour you choose. See the range of coloursteel colours here.
No two Alpine sheds are the same. Each and every one has its own uses for both the immediate and long-term future.
When deciding on the specifications of your new shed, ask yourself the questions, put some thought into the design and plan for the future. An Alpine building has a large number of areas where it can be customised and some small tweaks in the design phase can save large amounts of money and make your day-to-day life much easier down the track.
Most importantly, ask for help, it is a big project and a substantial investment that you are making so it pays to get it right.
The team here have worked on thousands of projects over the last 20 years and may well have some ideas for you to consider. Why not start by downloading one of our brochures to get some inspiration for your perfect shed project? Simply click the button to find the free brochure you need.